Get 10% descount on first project
Restoring Historic Ceilings with Overboarding, Shadow Gaps, and Cornice Preservation
Restoring Historic Ceilings with Overboarding, Shadow Gaps, and Cornice Preservation
Meta Title: Restoring High Ceilings with Shadow Gaps & Cornice | Daniel Lee Plastering
Meta Description: Discover how to expertly restore historic ceilings using overboarding, shadow gap beads, and cornice preservation. Step-by-step insights from Daniel Lee Plastering.
Introduction: Breathing New Life Into Historic Ceilings
There’s something undeniably majestic about stepping into a room with towering 3.2-meter-high ceilings, ornate original cornice, and centuries-old craftsmanship. But restoring these architectural gems comes with challenges — from ensuring structural integrity to preserving delicate details, all while working around modern flooring and finishes.
In today’s blog, we dive into a recent project by Daniel Lee Plastering and Rendering, where the team tackled two stunning, historic wood lath-and-plaster ceilings. Join us as we explore the meticulous process, the tools and techniques used, and the professional touches — like shadow gap beads — that elevate the final result. Whether you’re a homeowner, builder, or DIY enthusiast, this guide will provide valuable insights into ceiling restoration done right.
Preparing the Space: Protecting Floors and Setting Up
Before any work begins, protecting the homeowner’s space is priority number one — especially when dealing with new hardwood flooring.
Floor Protection Strategy:
- Two layers of Correx sheets: Heavy-duty, padded plastic sheeting protects against foot traffic and small tools.
- Plywood under scaffolding wheels: While Correx handles lighter loads, large scaffold towers require extra support to prevent floor damage.
- Heavy-duty rubber backing (if applicable): Adds additional cushioning under wheels.
By layering these protective materials, Daniel’s team ensures that even heavy scaffolding won’t dent or scratch valuable flooring.
Finding the Ceiling Joists: A Critical First Step
Since the customer wanted to retain the existing ceilings (rather than remove and replace them), the team chose to overboard — adding new plasterboard over the old structure. But to do that securely, they first needed to locate all the existing ceiling joists.
How They Found the Joists:
- Using a multi-tool: Small exploratory rectangles were cut into the ceiling to reveal timber locations.
- Mapping the joist direction: By checking both ends, the team could map out the entire structure.
- String line marking: Once located, they used a string line to create visible torque lines across the ceiling, ensuring accurate screw placement.
This preparatory step is essential for solid, long-lasting ceiling work.
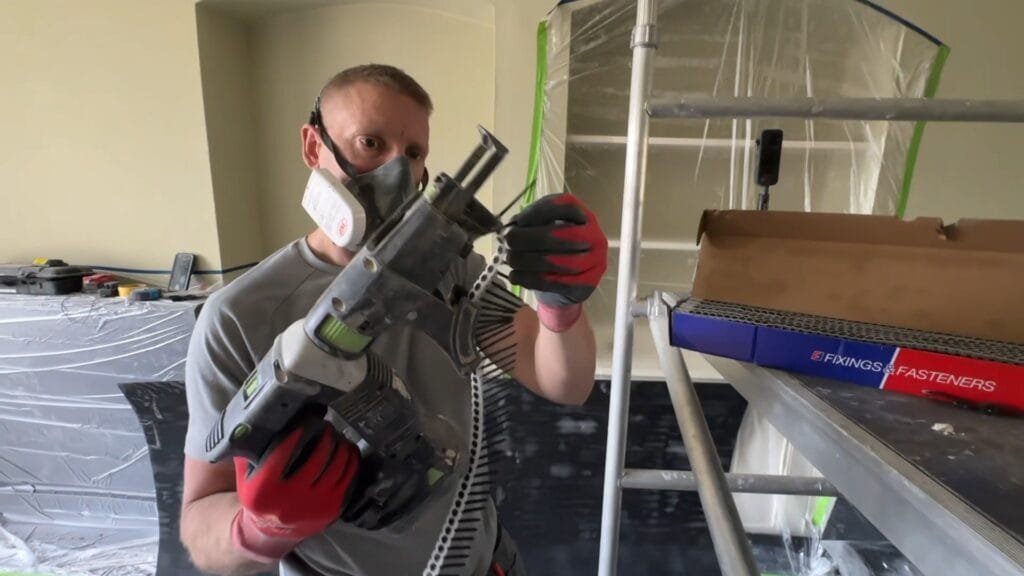
Overboarding the Ceilings: Tools, Techniques, and Precision
With the groundwork set, the team moved on to installing the new plasterboards.
Key Materials and Tools:
- 55mm collated screws (Festool Auto): Chosen for their length, ensuring at least 20mm penetration into the timber for a firm hold.
- Plasterboards: Carefully lifted and secured, working around the room section by section.
Best Practices for Plasterboard Fixing:
- Seven screws per 1.2-meter board section: This distribution prevents sagging and ensures durability.
- Double-checking screw heads: Any protruding screws were re-driven, and torn paper areas reinforced with scrim tape.
This attention to detail ensures the ceiling surface is smooth, secure, and ready for finishing.
Creating a Premium Finish: Shadow Gap Beads and Cornice Integration
One of the standout features of this project was the use of shadow gap beads — a detail that transforms the look of a room.
What Are Shadow Gap Beads?
Shadow gap beads create a sleek, recessed line between the plasterboard and adjoining elements (like cornice or walls), giving a sharp, contemporary edge. They’re a hallmark of professional-level finishing.
Application Process:
- Glue application: Beads were glued into place for extra hold.
- Meshing and taping joints: All seams were taped to strengthen the finish.
- First plaster coat: Flattened using a speed skim for a smooth base.
- Second plaster coat: Applied after sectioning the room into manageable halves, particularly useful when working with scaffolding in tight doorways.
The result? A seamless, polished ceiling that highlights both the old-world charm of the original cornice and the modern sharpness of the shadow gaps.
Overcoming Challenges: Working with Height and Preserving History
Working on ceilings over 3.2 meters high presents logistical challenges. Ladders are often too short, and while band stands or scaffold boards are an option, they can feel unstable.
Daniel’s Solution:
- Two scaffold towers on wheels: Provided stable, adjustable platforms for efficient, safe working at height.
- Sectional approach: Dividing the room into halves made setup and access easier without compromising the quality of the work.
This method not only preserved the property’s architectural beauty but also added strength by pulling the old ceiling back up to the joists, giving it a brand-new lease on life.
Why Overboarding Is a Smart Choice
Removing old ceilings can create:
- Massive mess from demolition.
- Increased labor and waste removal costs.
- Potential loss of original features, like ornate cornice.
By overboarding, you:
✅ Preserve historic details.
✅ Increase insulation.
✅ Save time and money.
✅ Achieve a professional, durable finish.
This approach balances heritage preservation with modern performance — a win-win for homeowners and craftsmen alike.
Final Touches and Clean-Up
Daniel’s team prides itself on leaving each project tidy. As they wrap up, they ensure:
- Tools and materials are cleaned up.
- Protective coverings are removed carefully.
- The property is left ready for decorating or immediate use.
This commitment to cleanliness and respect for the homeowner’s space is part of what sets true professionals apart.
Conclusion: Transform Your Ceilings with Expert Craftsmanship
Restoring historic ceilings is more than just a job — it’s an art. From carefully mapping joists to integrating shadow gap beads and preserving intricate cornice, every step matters.
If you’re considering a ceiling renovation, remember that professional techniques like overboarding can save time, preserve beauty, and enhance durability — all while achieving a stunning, modern finish.
Ready to transform your space?
👉 Share this blog with friends or colleagues planning a renovation.
👉 Comment below with your ceiling restoration questions or experiences!
👉 Subscribe to our newsletter for more expert tips and project showcases.
Keywords: ceiling restoration, shadow gap beads, overboarding ceilings, preserving cornice, plastering techniques, Daniel Lee Plastering, historic ceiling renovation, professional plastering tips, ceiling renovation ideas, plasterboard installation


