Get 10% descount on first project
How to Repair Hairline & Settlement Cracks Like a Pro: A Step-by-Step Interior Plastering Guide
How to Repair Hairline & Settlement Cracks Like a Pro: A Step-by-Step Interior Plastering Guide
Hairline and settlement cracks are a common issue in homes—often appearing as tiny, barely-there lines on walls or ceilings. While they might not signal structural damage, they can be unsightly and frustrating. Luckily, repairing these cracks is easier than you think. In this professional step-by-step guide, we’ll show you how to repair hairline and settlement cracks using the right tools, techniques, and materials—no prior plastering experience required!
Why Hairline and Settlement Cracks Appear
Before diving into the repair process, it helps to understand why these cracks appear:
- Natural settling of a new home over time.
- Temperature fluctuations causing expansion and contraction.
- Humidity levels affecting plaster and drywall.
- Drying shrinkage of plaster or filler.
These cracks are generally cosmetic, but prompt repair prevents them from worsening and restores the aesthetics of your home.
What You’ll Need
To follow this tutorial, you’ll need the following materials and tools:
- Stanley knife (new blade)
- Interior filler (e.g., Tretz Interior Filler)
- Mixing pot
- Water
- Flexible trowel or spatula
- Orbital sander (recommended: Milwaukee brand)
- Sandpaper (240 grit preferred)
- Protective sheets or dust covers
- Vacuum or dust extraction (optional but ideal)
Step 1: Prep the Area
Start by protecting your working area:
- Lay down thin dust sheets to catch any mess.
- Open windows for ventilation.
- Make sure your tools and filler are ready before you begin—the filler sets quickly.
Tip: Keeping the area clean and tidy not only makes the job easier but helps the filler adhere better.
Step 2: Open the Crack
This step is crucial to ensure the filler stays in place and doesn’t bulge out:
- Take your Stanley knife and lightly follow the line of the crack.
- Do this two or three times to create a small channel just a couple of millimeters deep.
- Angle your blade 90° to form a triangular groove. This gives the filler space to sit snugly.
Avoid digging too deep or wide. The goal is a narrow channel that can hold filler without bulging.
Step 3: Mix the Filler
- Use a small mixing pot, as you’ll only need a tiny amount for hairline cracks.
- Add a small amount of water to the filler powder (less is more here).
- Mix until it becomes a thick, stiff paste—you should see peaks when you stir.
Pro Tip: Stir with a spoon or whatever you have handy. An insulation fixing tool can even work in a pinch.
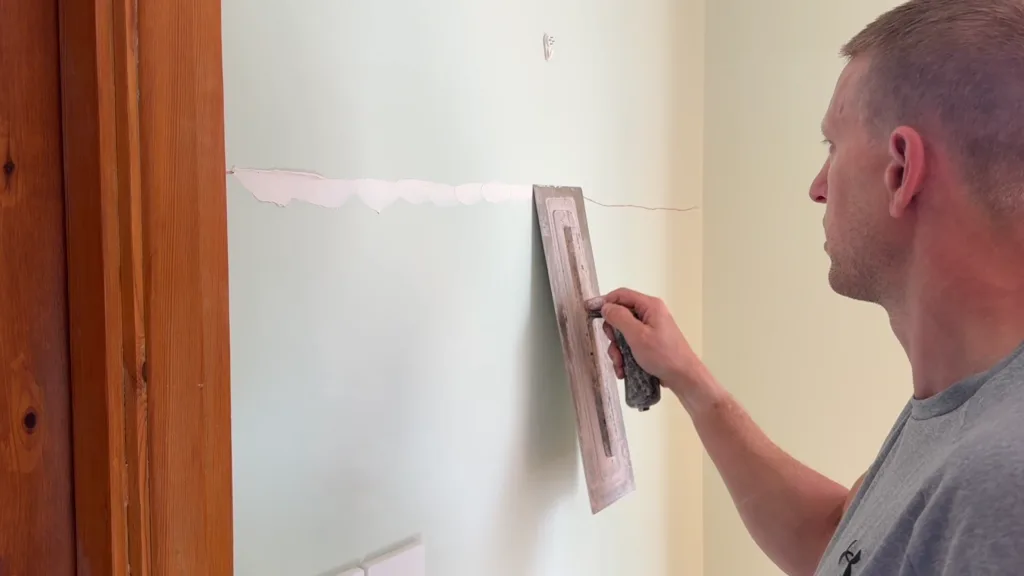
Step 4: Apply the Filler
- Use a flexible trowel or spatula to apply the filler into the groove.
- One pass is usually enough. You really don’t need much.
- Apply filler to all the cracks at once if you’re working on multiple areas.
- Let the filler set for about 20 to 30 minutes.
Reminder: Work quickly. This type of filler sets fast and is best for small spot repairs.
Step 5: Sand Smooth
Once the filler is dry:
- Check the area with your hand—ensure it’s fully dry before sanding.
- Use a 240-grit orbital sander for the best results.
- Lightly sand until the area is flush with the wall surface.
Pro Sanding Tips:
- Don’t overdo it—gentle sanding is all you need.
- Use an up-and-down motion for an even finish.
- Attach a vacuum to your sander to minimize dust.
- If dust becomes an issue, use a mask and open nearby windows.
Avoid using coarser sandpaper unless the area is particularly rough. For most hairline cracks, 240 grit is ideal.
Step 6: Final Touch-Up
- Wipe the area clean with a damp cloth.
- Touch up with matching interior paint.
- Once painted, the repair should be completely invisible.
From a cosmetic point of view, a proper sanding and paint job is key to a seamless look.
Maintenance and Prevention Tips
Now that you’ve fixed the cracks, here’s how to prevent them from reappearing:
- Use flexible, high-quality paint that can tolerate slight movements.
- Monitor humidity levels in your home, especially in winter.
- Keep your home well-ventilated to reduce moisture buildup.
Why We Recommend Tretz Interior Filler
- No primer required: Apply straight to the surface.
- No depth limit: Can be used in deep or shallow repairs.
- Fast-setting: Saves time for small jobs.
- Non-sagging: Fills evenly without falling out.
Whether you’re dealing with indoor cosmetic touch-ups or minor outdoor fixes, Tretz offers a professional-grade solution for homeowners and handymen alike.
Final Thoughts
Repairing hairline and settlement cracks doesn’t have to be intimidating. With the right tools, a bit of care, and the proper filler, you can achieve a smooth, professional result in under an hour. Say goodbye to unsightly cracks and hello to pristine walls!
Ready to Tackle Your Next Home Repair?
If you found this guide helpful, share it with others! Got a question or want to see more DIY repair tutorials? Drop a comment below or explore our other home improvement guides.
Stay tuned for more tips—and happy fixing!


