Get 10% descount on first project
Transforming Luxury Property Pillars with a White Silicone Top Coat: A Step-by-Step Guide
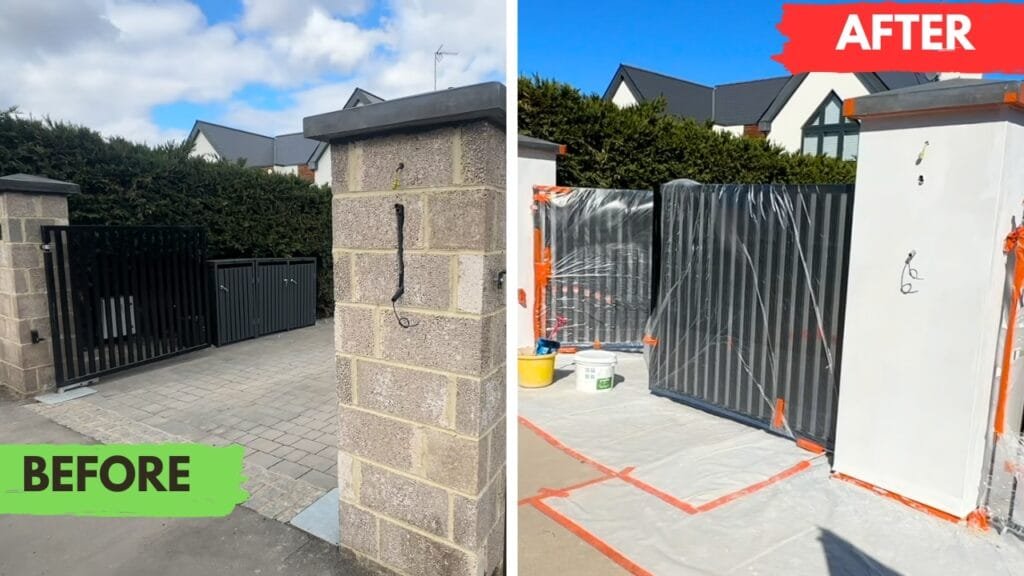
When it comes to high-end rendering projects, every detail counts—especially for luxury properties where aesthetics and durability go hand in hand. In this blog, we take you behind the scenes of a recent project by Daniel Lee Plastering and Rendering, where we applied a white silicone top coat on entrance pillars to perfectly match a multi-million-pound home’s existing facade.
Whether you’re a professional renderer, a contractor, or a homeowner interested in high-quality finishes, this detailed breakdown will guide you through the tools, techniques, and materials required for an exceptional finish.
The Project Overview
Located at the entrance of a stunning luxury home, the focus of this job was rendering two concrete block pillars that had been installed after the house was already rendered by a German company. These pillars, supporting a set of elegant electric gates, needed to seamlessly blend in with the house’s existing white silicone render.
Step 1: Installing White PVC Beads
Before any render is applied, proper beadwork is essential. In this project, 12mm white PVC beads were used, complete with drip beads at the base of the pillars. These components:
- Ensure sharp edges and consistent angles
- Promote water runoff with drip beads
- Blend aesthetically with the white render
White PVC beads are a personal favorite due to their durability and ability to maintain clean, professional lines.
Step 2: Applying the Base Coat with Reinforcement Mesh
Using Weber One Coat Render
To level and square up the surface, Weber one coat render was chosen for its excellent consistency and ease of use. While this render is designed as a “one coat” product, for optimal durability and finish, we applied it in two separate layers.
Embedding Reinforcement Mesh
Even though the concrete block pillars are structurally solid and unlikely to crack, adding reinforcement mesh is good practice. It offers:
- Increased tensile strength
- Reduced risk of surface cracking
- Better long-term finish quality
The mesh was pre-cut with openings for fixtures like the intercom system and exterior lights, ensuring a smooth installation process.
Step 3: Scratch Coat Application
Keying the First Layer
After embedding the mesh into the first coat, the surface was keyed using a scratching tool. This process:
- Improves adhesion for the final coat
- Ensures a uniform surface texture
- Prepares the render for optimal bonding
A light additional coat was applied over the mesh to build out slightly around features like drip beads and hollow areas under the letterbox.
Step 4: Prepping for the Final Coat
Cleaning and Soaking
The next day, the dry render was soaked using a battery-powered Ryobi pressure washer on a rinse setting. This gentle soaking:
- Prevents the new coat from drying too quickly
- Improves adhesion
- Provides better control than a hose pipe
Mixing the Final Coat
Weber render was mixed using a power drill mixer—a faster, more efficient method than traditional sand and cement mixing with a cement mixer. This provides:
- Consistent mixture every time
- Time savings and reduced labor
- A smoother application experience
Step 5: Applying and Finishing the Final Render Coat
With the base coat perfectly keyed and prepped, the final coat was applied using the same bead-to-bead method, ensuring a straight and even finish. The render was then:
- Smoothed with a power float
- Detailed with plastic floats for tighter areas
This layer could be left as-is for a traditional sand and cement finish. However, to match the house’s existing white silicone render, further steps were taken.
Step 6: Applying Primer and Silicone Top Coat
Importance of Using Quality Materials
A premium bio silicone render was used for the top coat. The key features include:
- Fungicidal and algicidal agents for self-cleaning and longevity
- Smooth and consistent application
- Excellent aesthetic match to the main house
A white primer was applied and left to cure for 24 hours before the silicone render was added.
Avoiding Inferior Products
The blog mentions a recent unsatisfactory experience with a K Rend silicone render, which was watery, difficult to apply, and lacked algicides. This reinforces the importance of choosing quality materials for both durability and ease of application.
Final Result: A Seamless Match
After careful layering, attention to detail, and expert technique, the rendered pillars now perfectly match the luxury property’s existing facade. The electric gates, intercom system, and letterbox are all beautifully framed, creating an elegant and functional entrance.
Why Silicone Render Is Ideal for Luxury Projects
For high-end properties, silicone render is becoming the preferred choice due to its:
- Low maintenance and self-cleaning properties
- Long lifespan with resistance to weather and algae
- Smooth, modern appearance
When applied correctly, as shown in this project, it enhances both the aesthetic and value of a property.
Tools and Materials Used
Here’s a quick rundown of the key materials and tools used:
- White PVC beads (12mm)
- Weber one coat render
- Reinforcement mesh (pre-cut)
- Plastic floats and power float
- Battery-powered Ryobi pressure washer
- Premium bio silicone render with algicides
- White primer (24-hour cure time)
Final Thoughts
Rendering may seem straightforward, but when it comes to luxury properties, it’s the fine details, quality of materials, and professionalism in application that make all the difference. From prepping the surface and embedding reinforcement mesh to choosing a premium silicone top coat, every step matters.
Did you find this guide helpful or inspiring for your own rendering project?
👉 Share this post with fellow contractors, designers, or homeowners.
💬 Leave a comment below to let us know your favorite render materials or methods.
🔔 Subscribe to our YouTube channel Daniel Lee Plastering and Rendering for more expert tips and behind-the-scenes project breakdowns.


