Get 10% descount on first project
Comprehensive Guide to Fixing Contaminated Damp Plaster
Welcome to Daniel Lee Plastering and Rendering! Today, I’m sharing a detailed walkthrough of how to repair and waterproof contaminated damp plaster. Whether you’re dealing with damp spots in your home or a professional seeking tips, this guide covers everything you need to know. Let’s dive in!
Identifying the Problem: Contaminated Damp Plaster
Contaminated damp plaster often presents as dark spots on your walls. These spots indicate underlying moisture issues that need to be addressed to prevent long-term damage. In our project, we tackled a small downstairs toilet that had significant damp problems due to an earlier incomplete repair. The moisture had bled through, highlighting the importance of proper preparation and execution.
Step 1: Preparing the Area
Before starting, it’s essential to protect the surrounding space. Here’s what we used:
- Floor Protectors: Blue floor protectors were laid out to shield the floor from dust and debris.
- Polythene Drop Sheets: These were secured with sticky tape at the top to cover the walls and fixtures.
- Render Tape: Orange render tape helped keep everything in place securely.
Using these materials ensured that the area was thoroughly protected from the mess that comes with plastering and rendering work.
Step 2: Cutting Out the Damaged Area
Marking the Damp Zone
Using a marker and a straight edge, we outlined the damp area. For effective results, it’s recommended to cut at least 30 centimeters beyond the visible damp spots to remove all affected material.
Cutting and Removing Plaster
An angle grinder was used to create straight lines, followed by a Milwaukee hammer drill to break out the damaged plaster. This process generates a lot of dust, so safety gear such as dust masks, gloves, and safety glasses is a must.
We discovered that while the top section of the wall was bone dry, the lower part had significant moisture and contamination. This confirmed the need to remove all backing plaster down to the brick.
Step 3: Waterproofing the Area
After removing the contaminated plaster, we applied SBR (Styrene-Butadiene Rubber) as a primer. SBR creates a strong bond and adds a waterproof layer to the surface. While PVA glue could work, SBR is far more durable and reliable for areas prone to dampness.
Let the SBR layer dry completely before moving to the next step.
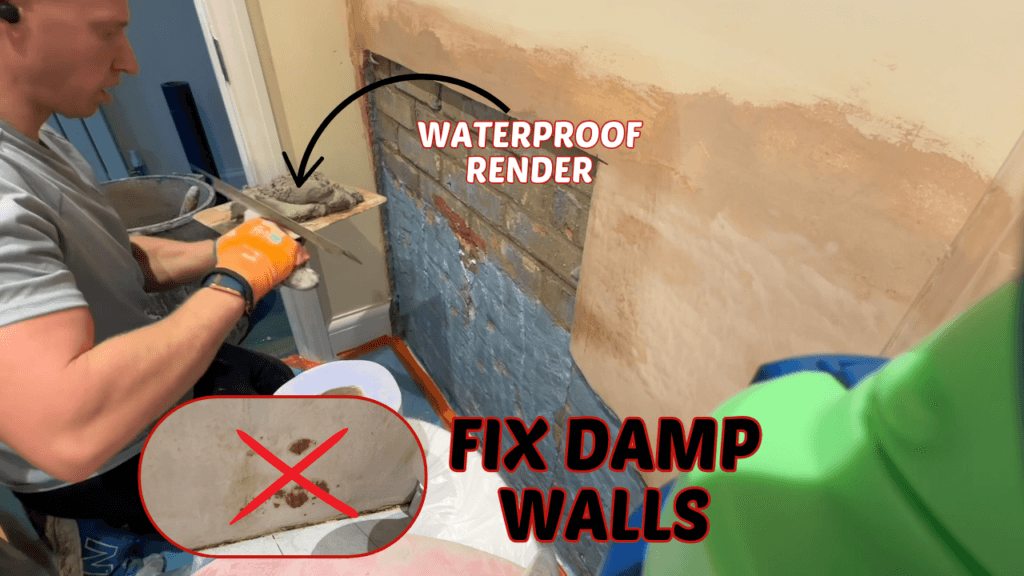
Step 4: Applying Waterproof Render
For this project, we used Weber One Coat Render with added waterproofing additives and SBR. This enhanced the render’s flexibility, strength, and waterproofing properties. The render was applied in a single layer approximately 20 millimeters thick.
Tips for Applying Render
- Use a Straight Edge: Ensure the render is flat and even.
- Build Up Layers Gradually: Avoid overloading the wall in one go.
- Check for Moisture: Properly mixed waterproof render should not absorb moisture. If it does, you’ve likely used insufficient waterproofer.
Step 5: Finishing with Multi-Finish Plaster
Once the render has dried (leave it for at least a day), apply the finishing plaster. For small patches, mix the plaster in a small bucket and focus on creating a seamless blend with the existing wall.
Feathering the Edges
To achieve a smooth transition, feather the plaster around the edges. Use a speed skim to flatten the first coat and follow up with a second coat for a polished finish. Remember, the process for small patches is the same as for larger walls, so don’t skip any steps.
Common Mistakes to Avoid
- Skipping the Undercoat: Always remove the backing plaster if it’s contaminated.
- Insufficient Waterproofing: Add enough waterproofer to your render to prevent future damp issues.
- Rushing the Process: Allow adequate drying time for each layer before moving on.
Why Waterproofing is Crucial
Damp problems can lead to:
- Structural damage
- Mold and mildew growth
- Reduced property value
By taking the time to properly waterproof and render your walls, you can prevent these issues and ensure a long-lasting repair.
Final Touches and Cleanup
After the plastering is complete, clean up the edges and remove any excess material. A paintbrush can be used to give the render a soft key, ensuring the finishing plaster adheres properly.
For small patches, you can use PVA to seal the surface before painting. This adds an extra layer of protection and ensures a flawless finish.
Video Walkthrough
For a visual step-by-step guide, watch the full video of this project on YouTube: https://youtu.be/8tjeIdkPpGU
Optimized for Guildford Residents
If you’re in Guildford or the surrounding areas and need professional plastering and rendering services, Daniel Lee Plastering and Rendering is here to help. Our expertise ensures your walls stay protected and look great for years to come. Contact us today for a consultation!
Keywords for Better Traffic
- Damp plaster repair Guildford
- Waterproof rendering services in Guildford
- How to fix damp walls
- Plastering tips for homeowners
- Guildford professional plastering
- Waterproofing solutions for damp walls
- Rendering and plastering experts in Guildford
- DIY plastering guide
- Contaminated damp plaster fix
By following this guide, you’ll have all the tools and techniques needed to tackle damp walls effectively. Don’t forget to check out the video for a detailed demonstration, and feel free to leave questions in the comments section below!


