Get 10% descount on first project
Ceiling Plasterboarding Masterclass: Pro Tips, Tools, and Mistakes to Avoid!

Plasterboarding a ceiling can be a challenging task, but with the right tools, techniques, and knowledge, you can achieve flawless results. Whether you’re a DIY enthusiast or a professional plasterer in Guildford, UK, this guide will walk you through the essential steps, common mistakes to avoid, and tools to make the job easier. Plus, stick around for an exclusive tip at the end to make your plasterboarding projects stand out!
Why Ceiling Plasterboarding is Important
Ceiling plasterboarding, also known as drywall installation, plays a crucial role in creating a smooth, polished look for interiors. Proper plasterboarding ensures durability, insulation, and a professional finish. In a place like Guildford, where homes often combine traditional and modern architectural elements, getting this right can significantly enhance the value and appearance of your property.
Tools You Need for Ceiling Plasterboarding
Before you start, gather the right tools to ensure efficiency and precision. Here’s a list of must-haves:
- Plasterboard Sheets – Choose the appropriate size and thickness based on your project requirements.
- Stud Finder – Essential for locating joists to secure the plasterboards.
- Festool Auto Gun – A lifesaver for quick and precise screwing.
- DeWalt Drywall Screw Gun – A reliable alternative for professional-grade fastening.
- Utility Knife – For cutting plasterboards to size.
- Plasterboard Lift – Makes handling large boards easier and safer, especially when working solo.
- Measuring Tape and Level – To ensure straight and accurate installations.
- Jointing Tape and Compound – For sealing gaps and achieving a seamless finish.
- Sanding Block – To smooth out the final surface.
- Safety Gear – Dust masks, goggles, and gloves to protect yourself during the process.
Step-by-Step Guide to Ceiling Plasterboarding
- Plan Your Layout
- Start by measuring the ceiling dimensions and planning the layout of the plasterboards. This helps minimize wastage and ensures that the joints align with the joists.
- Prepare the Ceiling
- Remove any old fixtures or debris and ensure the joists are clean and sturdy. Use a stud finder to mark the joists for easier alignment.
- Cut the Plasterboards to Size
- Use a utility knife to cut the plasterboards. Measure twice and cut once to avoid errors.
- Position the First Board
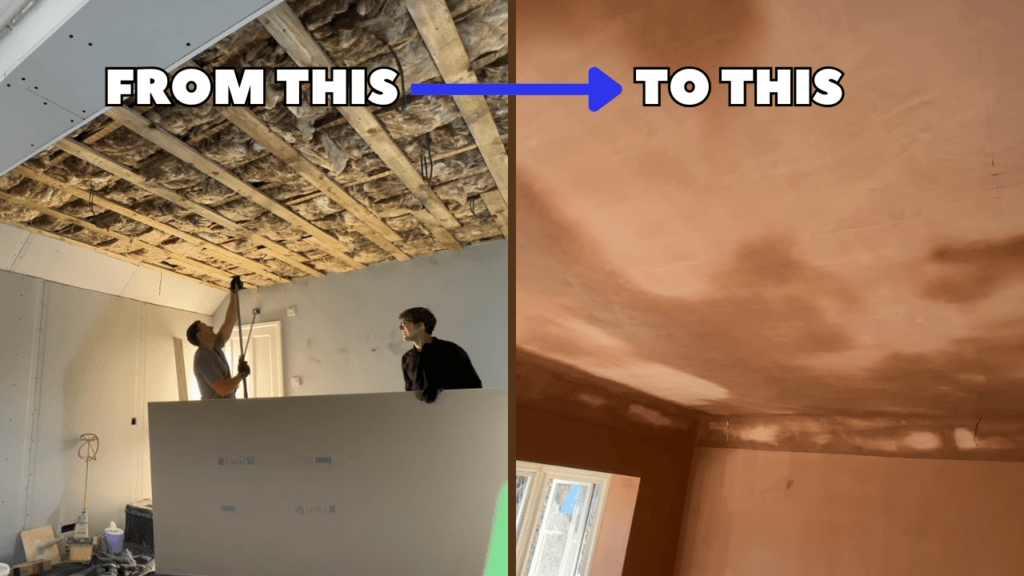
- Always start at one corner of the ceiling. Use a plasterboard lift or an extra pair of hands to position the board against the joists.
- Secure the Plasterboard
- Use your Festool auto gun or DeWalt screw gun to secure the plasterboard in place. Ensure the screws are evenly spaced, around 12 inches apart.
- Continue Installing Boards
- Repeat the process, ensuring the boards fit snugly together. Stagger the joints to enhance the ceiling’s structural integrity.
- Apply Jointing Tape and Compound
- Once all the boards are secured, cover the seams with jointing tape. Apply a thin layer of joint compound over the tape, feathering the edges to blend with the plasterboard surface.
- Sand the Surface
- After the compound dries, use a sanding block to smooth the surface. Be gentle to avoid damaging the plasterboards.
Common Mistakes to Avoid
- Incorrect Screw Placement
- Screws that are too close to the edges can cause the plasterboard to crack. Maintain at least a 1-inch distance from the edge.
- Skipping the Jointing Tape
- Without jointing tape, the seams will crack over time, leading to an unprofessional finish.
- Uneven Surface Preparation
- Failing to smooth out the joint compound can result in a bumpy ceiling. Take your time with sanding to achieve a flawless finish.
- Using the Wrong Tools
- Investing in high-quality tools like a Festool auto gun or DeWalt screw gun can save time and improve the overall outcome.
- Ignoring Safety Precautions
- Always wear safety gear, especially when working overhead. Falling debris or dust can cause injuries.
Advanced Tips for Professionals
- Use Expansion Gaps
- In larger ceilings, leave a small gap between boards to accommodate natural expansion and contraction.
- Bead Installation
- For corners, use metal or plastic beads to reinforce edges and ensure a straight finish.
- Soundproofing Options
- Consider using acoustic plasterboards or adding insulation between the joists for soundproofing.
- Moisture-Resistant Boards
- In areas like bathrooms or kitchens, use moisture-resistant plasterboards to prevent damage from humidity.
Why Choose Professional Plasterboarding Services in Guildford
If you’re based in Guildford and prefer leaving ceiling plasterboarding to the experts, hiring local professionals can make all the difference. Here’s why:
- Expertise: Professionals have the experience to handle complex projects efficiently.
- Quality Tools: They come equipped with the best tools, ensuring a high-quality finish.
- Time-Saving: A professional team can complete the job faster than a DIY approach.
- Guaranteed Results: With professional services, you’re assured of a flawless, long-lasting ceiling.
Why Guildford Homeowners Should Invest in Quality Plasterboarding
Guildford is known for its mix of historic and contemporary homes. Whether you’re renovating a traditional property or building a modern one, ceiling plasterboarding is a key element in enhancing your interior’s aesthetics and functionality. High-quality plasterboarding not only improves the appearance but also adds to the property’s value, making it a worthwhile investment.
Final Thoughts
Ceiling plasterboarding might seem daunting, but with the right tools, techniques, and a bit of patience, you can achieve professional-grade results. Whether you’re tackling a DIY project or hiring experts in Guildford, paying attention to detail and avoiding common mistakes will ensure a seamless finish. Don’t forget to explore advanced tips like using moisture-resistant boards or soundproofing for added benefits.
Stay Connected
If you found this guide helpful, don’t forget to share it with others who might benefit. For more plastering and rendering tips, subscribe to my YouTube channel at youtube.com/@danlee40. Get exclusive insights, tutorials, and behind-the-scenes looks at professional plastering projects. Let’s transform your spaces, one ceiling at a time!


