Get 10% descount on first project
Overboarding a Ceiling in Guildford: Step-by-Step Guide for a Crack-Free Finish
Renovating your home often means tackling tasks like overboarding ceilings to achieve a smooth, professional finish. Whether you’re upgrading your property in Guildford or anywhere else, overboarding can save time and effort compared to removing and replacing an entire ceiling. In this guide, we’ll walk you through the entire process of overboarding a ceiling, sharing tips, tools, and techniques to ensure the best results.
Why Overboard a Ceiling?
Overboarding is the process of fixing new plasterboards directly onto an existing ceiling. This method is particularly useful if the current ceiling is uneven or cracked but structurally sound. By overboarding, you avoid the mess and time involved in removing the old ceiling. Instead, you can create a smooth, crack-free surface ready for plastering.
If you’re in Guildford and looking for plastering or ceiling renovation services, this guide will give you insights into how professionals handle this job. And if you’re a DIY enthusiast, you’ll learn everything you need to know to do it yourself.
Tools and Materials You’ll Need
To get started, here are the essential tools and materials:
- Plasterboards: Standard plasterboards for ceilings. Measure your room to determine how many sheets you’ll need (add a little extra for waste).
- Multi-Tool: A versatile tool for cutting and trimming plasterboard. Popular brands like Milwaukee and DEWALT are highly recommended.
- String Line: Helps create a precise grid on the ceiling, showing where to fix plasterboards.
- Plastering Stilts: Useful for working at height without constantly climbing up and down a ladder.
- Screws and Screw Gun: Use plenty of screws to secure the plasterboards and prevent cracking.
- Measuring Tape: For accurate measurements.
- Safety Gear: Dust masks, goggles, and gloves to protect yourself from dust and debris.
Step-by-Step Guide to Overboarding a Ceiling
1. Locate the Ceiling Joists
The first step is finding the joists in your ceiling. These wooden beams provide the support structure for the new plasterboards. Here’s how to do it:
- Use a multi-tool to cut small squares into the existing ceiling along where you suspect the joists are.
- If necessary, tap the area with a hammer to expose the joist fully.
- Once you’ve found one joist, measure to locate the others (they are usually spaced evenly, about 400mm to 600mm apart).
Tip: If your room is being renovated, as in our example, the electrician might have already made circular cuts in the ceiling. Use these as a starting point to locate the joists.
2. String Line the Ceiling
Once you’ve located the joists, the next step is to use a string line to mark a precise grid on the ceiling. This grid will guide you in fixing the plasterboards.
- Attach the string line securely to one end of the ceiling, stretching it across to the opposite side.
- Pull the string tight, ensuring it’s level, and mark the lines using chalk.
- Repeat this process to create a grid covering the entire ceiling.
Working with a partner makes this task easier, but if you’re on your own, you can still manage by screwing the string at one end, pulling it taut, and marking the lines.
3. Prepare the Plasterboards
Now that the ceiling is marked, you can start preparing your plasterboards. Measure the ceiling dimensions and cut the boards to fit.
- Use a measuring tape to mark the board dimensions accurately.
- Cut the boards using a multi-tool. Brands like Milwaukee and DEWALT offer reliable options. While both are excellent, it often comes down to personal preference.
- Remember to wear safety gear, including goggles and a dust mask, while cutting plasterboards to protect yourself from dust and particles.
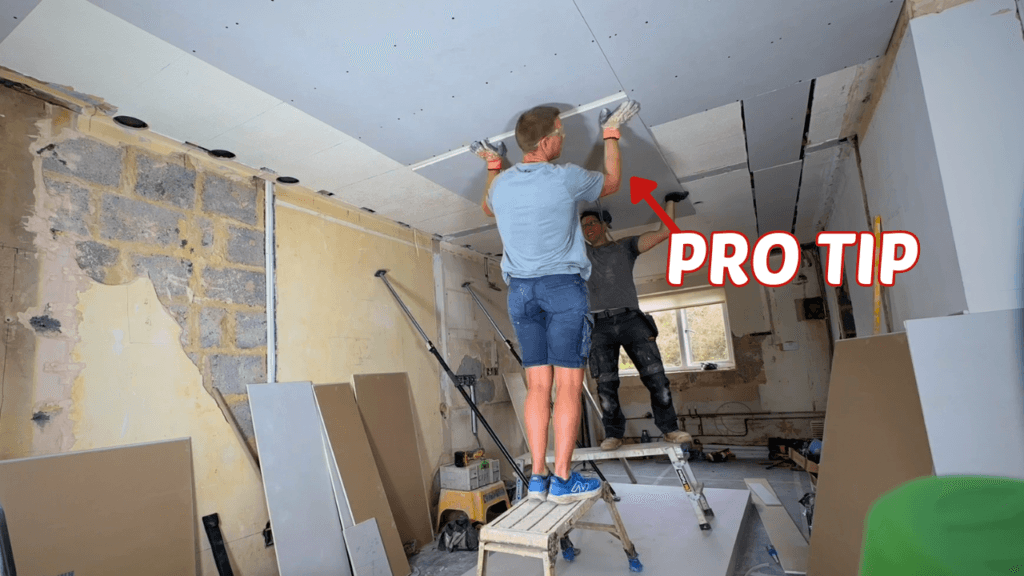
4. Fix the Plasterboards
With the plasterboards prepared, it’s time to attach them to the ceiling:
- Start at one end of the room and work your way across.
- Use dead men supports to hold the boards in place while you secure them with screws.
- Ensure the boards are fixed in a staggered pattern (like bricks). This reduces the chances of cracks forming along long, straight lines.
- Place screws approximately 150mm apart along the joists to ensure the boards are securely fixed.
5. Address Problem Areas
If the electrician has removed sections of the old ceiling, you may need to pack out these areas before attaching the new boards. This ensures the surface is level and provides a solid foundation for the plasterboards.
6. Finishing Touches
Once all the boards are in place, inspect the ceiling to ensure everything is secure and aligned. At this stage:
- Mark any areas that need additional screws.
- Check the staggered pattern and ensure there are no gaps between boards.
- Clean up any dust or debris before moving on to plastering.
Pro Tips for Overboarding a Ceiling
Use Plastering Stilts
Plastering stilts can save you a lot of time and effort. They allow you to work at height without constantly climbing up and down ladders. While they might look intimidating, they’re relatively easy to use if you have basic balance skills.
Secure Your Boards Properly
The more secure the plasterboards are, the less likely you are to experience cracks later. A good rule of thumb is to use around 7 screws per 1.2-meter-wide plasterboard.
Don’t Skip Safety Gear
Working overhead creates a lot of dust and debris. Always wear goggles, a dust mask, and gloves to protect yourself. These items are inexpensive but essential for your safety.
Why Choose Professionals in Guildford for Ceiling Renovations?
While DIY overboarding can be rewarding, it’s not for everyone. Hiring a professional plasterer in Guildford ensures the job is done efficiently and to the highest standard. Professionals have the experience and tools to tackle even the trickiest ceilings, giving you peace of mind and a flawless finish.
If you’re based in Guildford and need help with plastering or ceiling renovations, Daniel Lee Plastering and Rendering offers expert services tailored to your needs. From overboarding ceilings to full-scale plastering projects, we’re here to help.
Frequently Asked Questions About Overboarding Ceilings
1. How long does it take to overboard a ceiling?
It depends on the size of the room and your level of experience. A professional team can usually complete a standard-sized ceiling in a day.
2. Do I need to remove the old ceiling before overboarding?
Not necessarily. If the old ceiling is structurally sound, you can overboard directly onto it.
3. Can overboarding prevent cracks?
Yes, when done correctly, overboarding reduces the likelihood of cracks by creating a smooth and secure surface.
Final Thoughts
Overboarding a ceiling is a practical and efficient way to renovate a room without the hassle of removing the old ceiling. With the right tools, techniques, and safety precautions, you can achieve a professional finish that’s both durable and visually appealing. Whether you’re a DIY enthusiast or prefer to hire a professional, this guide gives you all the information you need to get started.
If you’re in Guildford and looking for reliable plastering services, contact Daniel Lee Plastering and Rendering today. We’re happy to help with all your plastering and rendering needs. Don’t forget to check out our other guides and videos for more expert tips and advice!


