Get 10% descount on first project
Damp Proofing Done Right: Removing Bridging Render and Pebble Dashing the Proper Way
Damp problems in exterior walls are often blamed on faulty materials or weather exposure — but in many properties, the real issue is bridging render. When the render or pebble dash runs all the way down to ground level, it can cross the damp proof course (DPC) and act as a moisture bridge straight into the building fabric. Over time, this leads to cold walls, mould, high humidity, and internal damp patches.
In this project, we worked on a property where the existing render had been taken right down to the floor. The wall looked solid from the outside, but the damp course had effectively been bypassed. This blog walks through the full process we used to remove the bridging render, protect the damp course, install specialist drip beads, and re‑apply a high‑quality pebble dash finish — with a strong focus on best practice, protection, and long‑term durability.
Understanding the Problem: How Render Bridges the Damp Proof Course
Render is often thought of as a protective coating — but when it runs below or across the DPC, it becomes a moisture carrier instead. Rainwater and surface moisture soak into the render, and because the material is porous, it acts like a wick. If the render crosses the DPC, that moisture is able to ‘jump’ the barrier and travel upward into the wall.
Over months and years, this can introduce moisture into the internal structure of the building, contributing to:
- damp patches along skirting‑level areas
- mould growth and a musty smell indoors
- high internal humidity
- damaged plaster and paintwork
On this property, the render had gone straight to ground level. The solution wasn’t just to repair the visible areas — it was to cut back the system, expose the DPC, and ensure future moisture couldn’t track back into the wall.
Step 1 — Protecting the Working Area Before Any Removal Work
Before we begin removing render or pebble dash, we always take time to thoroughly protect the surrounding areas. This not only prevents accidental damage, but also makes the cleanup process quicker and more professional at the end of the job.
For this project, we used a multi‑layer protection setup:
- A polythene sheet taped to the floor to provide a waterproof barrier against spillages
- A layer of chipboard or ply above that to absorb impacts from tools and falling debris
- A tarpaulin on top to collect rubble and make clearing up far easier
We also scraped back loose gravel and debris around the perimeter so that removal could be carried out neatly down to the correct level. Good preparation reduces risk, speeds up the workflow, and leaves a much cleaner result.
Step 2 — Cutting a Clean Line Above the Damp Course
Once everything was protected, we marked a clear torque line around the perimeter of the property. The cut needs to sit slightly above the damp course to make room for the drip bead and the repaired render.
A precise and consistent line is vital here. We used a high‑quality diamond blade on an angle grinder to follow the line around the full perimeter of the building. Although it looks quick on camera, this stage takes time and must be carried out carefully to avoid unnecessary damage to the brickwork beneath.
After cutting the line, we moved on to the removal stage.
Step 3 — Removing the Bridging Render Safely and Efficiently
To get the material off cleanly and with minimal disruption to the surrounding surfaces, we used professional demolition hammers in a few different sizes. The aim is to break and lift the render back to the cut line without damaging the underlying masonry.
Once all the render was removed around the base of the wall, we cleared away the rubble and vacuumed the surface thoroughly using a commercial‑grade vacuum that can handle plaster and debris. Even with careful work, older brick surfaces can be extremely dusty — so we followed up with a specialist water‑based primer designed for highly porous brickwork.
This helps:
- control suction
- strengthen the surface
- improve adhesion for the scratch coat
Good preparation at this stage means a stronger, longer‑lasting finish later on.
Step 4 — Installing Specialist Drip Beads to Break Moisture Transfer
This is one of the most important steps in preventing future damp bridging.
A standard cut line alone isn’t enough — moisture can still track under the edge of the render and back into the brickwork. To eliminate this risk, we installed high‑quality drip beads along the full perimeter.
These beads are designed so that any rainwater running down the wall drips cleanly away instead of being drawn back underneath into the building fabric. The particular bead we used features a pronounced drip lip, which forces moisture to fall clear of the wall rather than curling underneath.
To further enhance protection, we applied a continuous thick bead of strong sealant adhesive along the DPC line. This not only bonds the bead securely until the render goes on, but also extends the damp barrier to prevent any render from bridging behind the bead.
The end result is a continuous, secure moisture break — exactly where it should be.
Step 5 — Applying the Scratch Coat and Preparing for Pebble Dash
With the beads installed and the wall primed, we applied the first (scratch) coat of render. This coat is set slightly back from the finished surface to allow enough thickness for the final pebble dash layer.
Because pebble dash requires a little more build‑up, we ensured there was at least 8–10mm of top coat thickness available. The scratch coat was then combed to create strong mechanical keying for the final coat. On a warm day like this one, we also soaked the wall to slow down drying and reduce the risk of shrinkage cracking.
Keeping the worksite tidy is important here — especially when pebble dashing — so we cleaned the ground area ahead of the finishing stage to allow loose stones to be reused.
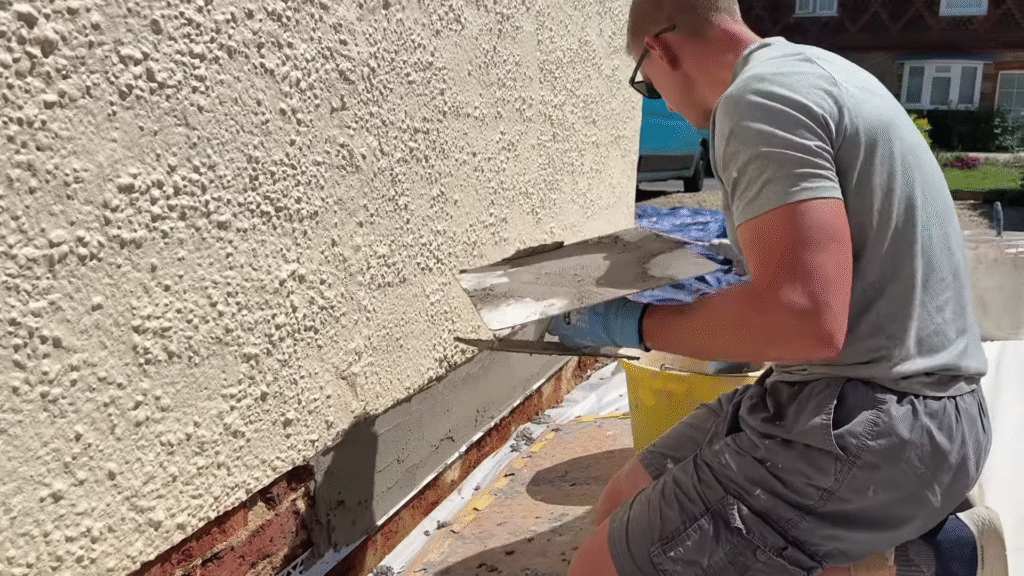
Step 6 — Re‑Rendering and Blending Into the Existing Pebble Dash
On the following day, we soaked the wall again — in fact, we applied two to three soaks because the render was particularly porous and the weather was hot. This prevents the top coat from pulling in too quickly when applying the finish.
We mixed the finishing render and began laying on the final coat to the correct thickness. Patching into old pebble dash can be challenging because the existing surface is uneven, worn, and in this case over a century old. However, that texture can also work in your favour when blending.
We carefully worked from drip bead to existing dash, setting the render just a couple of millimetres back at the cut line. This gives space for the stones to sit flush once applied. Chris followed behind, tidying the line and cleaning away any excess for a sharp, consistent finish.
For this job we used 10mm gravel stones — a common and reliable size for pebble dashing — and applied them directly by hand. While specialist tools exist, hand‑throwing gives excellent control for detailed areas and patch repairs.
A clean tarpaulin underneath allowed us to catch and reuse around half of the stones that bounced off the surface, saving waste and keeping the area tidy.
Step 7 — Final Blending, Cleanup, and Finishing Touches
Once the stones were applied, we wiped back and straightened the trail lines to create as seamless a blend as possible. Older pebble dash tends to lose stones over time and can look more sparse, especially when compared with freshly applied sections — but once repainted, the new work blends in extremely well and softens further with age.
Cleanup is a vital but often overlooked stage. Leaving cement staining or debris can lead to unnecessary pressure washing or chemical treatment later on. By cleaning as we work — vacuuming awkward areas and clearing stones and dust — we finished with a neat, professional result and minimal disruption to the property.
The repaired area now sits safely above the damp proof course, with the drip bead breaking any risk of moisture tracking back into the wall. The pebble dash finish ties in with the original exterior while protecting the structure for years to come.
Why This Method Matters
This wasn’t simply a cosmetic repair — it was a functional correction to a damp‑related building problem. By:
- removing render that bridged the DPC
- installing a specialist moisture‑breaking drip bead
- extending the damp barrier with sealant
- controlling suction with primer and soaking
- rebuilding with correct thickness and keying
we restored the effectiveness of the damp proof course while preserving the character of the exterior wall.
Too often, damp repairs focus only on symptoms inside the property. In many cases, the source of the issue lies outside — in small details like bridging render, blocked air vents, or poorly detailed finishes. Correcting these properly prevents recurring problems and protects both the building and its occupants.
Need Professional Damp‑Proof Rendering or Pebble Dash Repairs?
If your home has damp issues around skirting level, or your exterior render runs all the way to the ground, it may be bridging your damp proof course just like this property.
We specialise in:
- damp proof rendering
- pebble dash repairs and reinstatement
- heritage and traditional property work
- moisture‑safe exterior finishes
All work is carried out with care, attention to detail, and a strong focus on long‑term performance — not just appearance on the day.
If you’d like advice, an inspection, or a quote for repairs, feel free to get in touch — we’re always happy to help and discuss the best solution for your property.


