Get 10% descount on first project
Shocking Damp & Mould Damage Inside This Home: A Failed Render Disaster Repair
When homeowners invest in external rendering, they expect protection from the elements—not damp, mould, and structural headaches. Unfortunately, when rendering fails, it can cause devastating internal issues. Recently, our team at Daniel Lee Plastering and Rendering tackled a property where poor render had led to years of severe damp and mould damage. This post takes you through what went wrong, how we fixed it, and what you can learn to protect your own home.
How Failed Render Causes Damp and Mould
External render is designed to protect a home’s walls from water penetration. But when it cracks, blows, or deteriorates, it traps moisture instead of repelling it. In this case, the failed render had been left untreated for years, allowing water to seep into the property.
Common Signs of Damp from Failed Render:
- Dark, patchy stains on walls
- Bubbling or peeling plaster
- White salt deposits (efflorescence)
- Rust bleeding through metal angle beads
- Musty odours and mould growth
In this property, the damage was so extensive that even galvanized metal components had rusted through.
Step 1: Tackling the External Problem
The first step in any damp repair is addressing the root cause. On this project, we:
- Removed all contaminated external render
- Installed 100mm external insulation for energy efficiency and protection
- Applied a full coloured silicone render system to ensure long-term durability
By stopping water ingress externally, we could then safely move on to repairing the internal damage.
Step 2: Removing Contaminated Internal Plaster
Inside the property, the plaster had been heavily compromised by moisture. Some areas had delaminated completely, leaving hollow sections that crumbled under light pressure.
What We Did:
- Protected floors and surfaces with polythene, tarpaulin, and boards
- Carefully cut out rusted angle beads with an angle grinder
- Removed all blown, loose, or soft plaster back to brick
- Ensured only solid, stable sections remained for repair
Guaranteeing long-lasting results requires stripping everything back to a sound base.
Step 3: Priming the Walls with Stabilizing Solution
Moisture leaves behind salts and stains, which can bleed through fresh plaster and paint if untreated. Instead of relying on outdated PVA, we:
- Applied a specialized stabilizing primer to the exposed brickwork
- Used brushes and rollers to achieve thick, even coverage
- Allowed sufficient drying time before replastering
This ensured that no hidden damp spots could compromise the new finish.
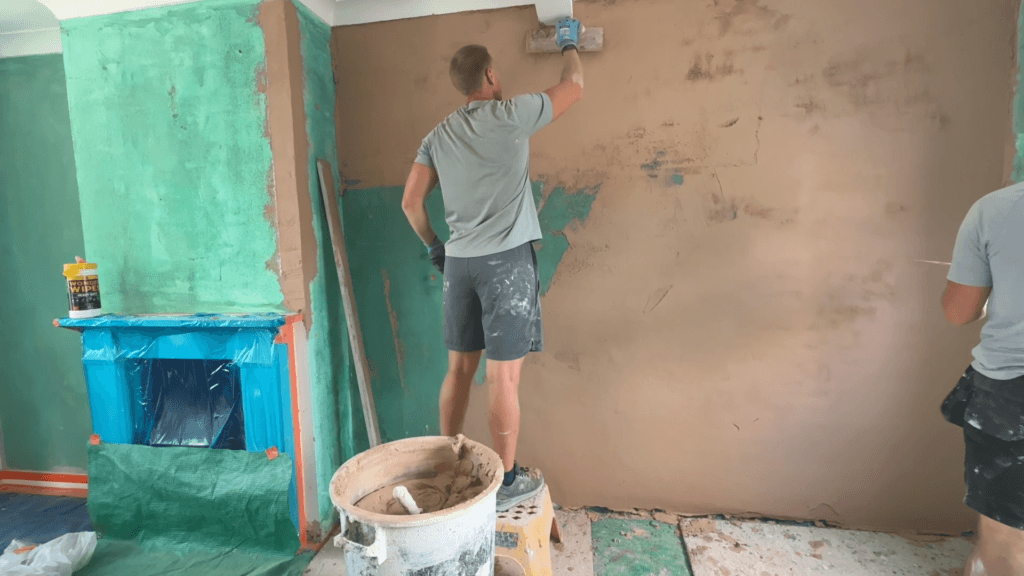
Step 4: Replastering with Hardwall Undercoat
Once prepped, it was time to rebuild the internal surface:
- Mixed and applied Hardwall undercoat plaster—ideal for medium suction surfaces
- Used the existing wall as a guide to straighten the surface
- Floated the plaster to create an even base
- Applied a devil float (spiked float) to key the surface for the finishing coat
This stage restored strength and stability to the damaged walls.
Step 5: Preparing for the Final Finish
With all prep work complete, the walls were ready for a smooth finishing plaster coat. Thanks to thorough preparation, including stabilizing, priming, and reinforcing repairs, the new plaster will last for years without damp-related issues reappearing.
Key Lessons for Homeowners
Failed render isn’t just a cosmetic issue—it can destroy your internal walls and create health hazards. Here’s what you can do to protect your property:
- Inspect your render regularly for cracks, detachment, or water staining
- Address issues early before damp spreads inside
- Use professional contractors who guarantee their work
- Don’t cut corners with materials—choose stabilizing primers and modern render systems
Final Thoughts
This project highlights just how damaging neglected render can be—and how vital thorough repairs are for long-term protection. By addressing the external and internal issues step by step, we restored this home to a safe, dry, and healthy condition.
If you’re dealing with damp, mould, or rendering problems, don’t wait until it escalates. Seek expert advice and act fast.


