Get 10% descount on first project
Garden Wall Rendering Makeover: A Step-by-Step Guide to a Stunning Finish

A tired garden wall can drag down the entire look of your outdoor space. But with the right tools, techniques, and a bit of patience, you can breathe new life into your exterior brickwork. In this blog, we walk you through a professional garden wall rendering makeover as seen in a real-world project by Daniel Lee Plastering and Rendering.
Whether you’re a seasoned pro or a curious DIYer, this guide will give you practical insight into the render repair process, what tools to use, and why temperature and timing matter more than you think.
Introduction: A Wall with a History
This wasn’t just any wall. It was a return visit to a project previously completed, where time and weather had taken their toll. The wall had begun to flake, crack, and show signs of aging. Instead of replacing it entirely, the goal was to revive the wall with a fresh rendering job that would restore its appearance and improve its durability.
Step 1: Surface Prep and Old Render Removal
Before applying anything new, it’s crucial to remove the old, damaged render. This involves:
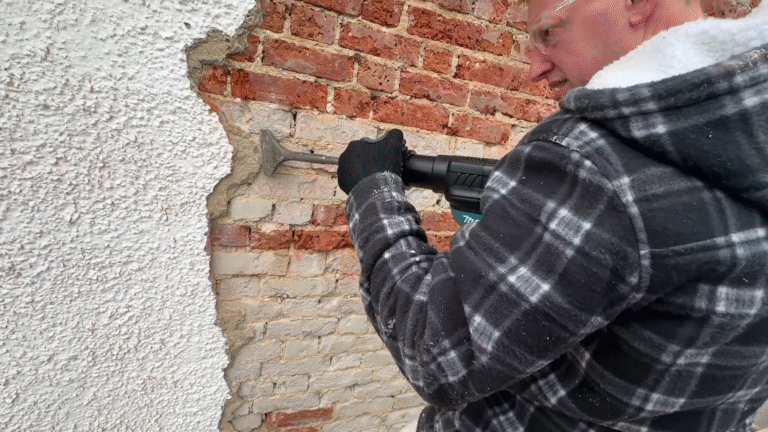
- Hacking off the old render using a 3-in-1 hammer chisel (a favorite tool for this job).
- Avoiding unnecessary damage to the brickwork beneath.
- Checking for hollow spots and structural weaknesses.
Tip: A good tool makes all the difference. Invest in a solid hammer chisel or power tool to speed up the process without compromising precision.
Step 2: Beading and Priming
Once the wall is stripped, the next step is preparing it for a fresh coat:
- Apply a universal primer using a long-pile roller. This is especially important on old, flaky brickwork.
- Attach beads around the perimeter for clean edges and to shape the wall corners.
- Make sure the surface is stable and consistent.
Why primer? It helps the new render bond better and reduces the chances of future cracking.
Step 3: Suction Control with Water
Before rendering, the wall is lightly wetted down. Why?
- Suction control. Dry bricks will pull moisture out of the render too quickly, leading to cracking.
- A damp surface ensures the render has time to set correctly and cure slowly.
Tip: Use a spray bottle or hose with a gentle mist setting for even moisture distribution.
Step 4: Mixing and Applying One-Coat Render
For this project, a one-coat render was used, offering simplicity and speed. Here’s how it’s handled:
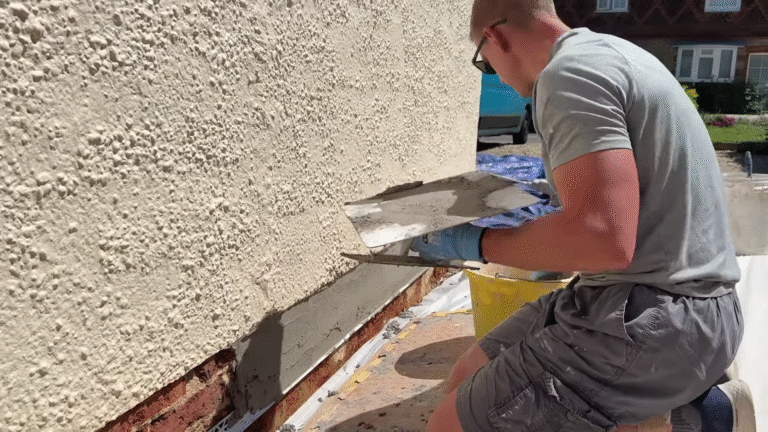
- Apply evenly using a plastering trowel.
- Use a plastic float for best results, especially with modern renders.
- In colder months, adjust your approach as render behaves differently in lower temperatures.
Foam floats can be helpful if the render starts to set too fast—though this is less likely in chilly weather.
Step 5: Timing is Everything
Temperature and sunlight have a huge effect on how render behaves:
- Sun-exposed areas may set quicker.
- Shaded or cooler sections may need more time.
- Always check by touching the render. If it’s tearing or dragging while floating, it’s too wet.
Tip: Work in sections and follow the sun. Adjust your schedule based on how the wall is reacting.
Step 6: Finishing Touches with a Sponge Float
Once the render is nearly set:
- Use a damp sponge float to achieve a smooth, even texture.
- This helps remove float lines and gives the render a professional finish.
A simple jumbo car sponge works well—no need for anything fancy.
Final Thoughts: Weather Challenges and Real-World Patience
Every rendering job has its quirks. In this case, the weather added unexpected complexity:
- Cool temperatures (around 8-10°C) slowed down drying.
- Sudden sunlight caused uneven setting.
- Experience and patience were key to adapting the technique in real time.
This job was a great reminder that rendering is part art, part science. Knowing your materials, reading the environment, and using the right tools are what separate a decent job from a stunning finish.


