Get 10% descount on first project
How to Apply a Latex Self-Leveling Screed: A Step-by-Step Guide
How to Apply a Latex Self-Leveling Screed: A Step-by-Step Guide
Introduction
A perfectly leveled floor is essential for any renovation or construction project. Whether you’re dealing with subsidence issues or preparing a base for new flooring, using a high-quality latex self-leveling screed can make all the difference. In this guide, we’ll walk you through the process of applying a self-leveling screed, ensuring a durable and professional finish.
Why Use a Latex Self-Leveling Screed?
Latex self-leveling compounds are preferred for several reasons:
- High Strength & Durability – Ideal for deep filling and repairing uneven surfaces.
- Versatility – Can be used on various surfaces, including tiles and damp floors.
- Self-Leveling Properties – Minimizes manual effort while ensuring a smooth finish.
- Quick Drying – Saves time, making it a great option for renovations.
Tools and Materials Needed
Before starting, gather the following materials:
- Latex self-leveling compound (e.g., Ardex RXNA or similar high-strength product)
- Mixing bucket
- Airless paddle mixer (to prevent excessive air bubbles)
- Notched spatula or trowel
- Spiked roller (for removing air bubbles)
- Measuring jug
- Protective gloves
- Rubbish bags (for sealing gaps and preventing seepage)
Step-by-Step Application Guide
Step 1: Preparing the Surface
One of the great advantages of latex self-leveling screed is that it can be applied to various surfaces without priming. However, ensure the floor is clean and free of dust or debris.
- Check for gaps or holes: Fill any gaps along the edges with rubbish bags or stones to prevent leakage.
- Assess the depth: Measure the uneven areas to determine if deep filling is required.
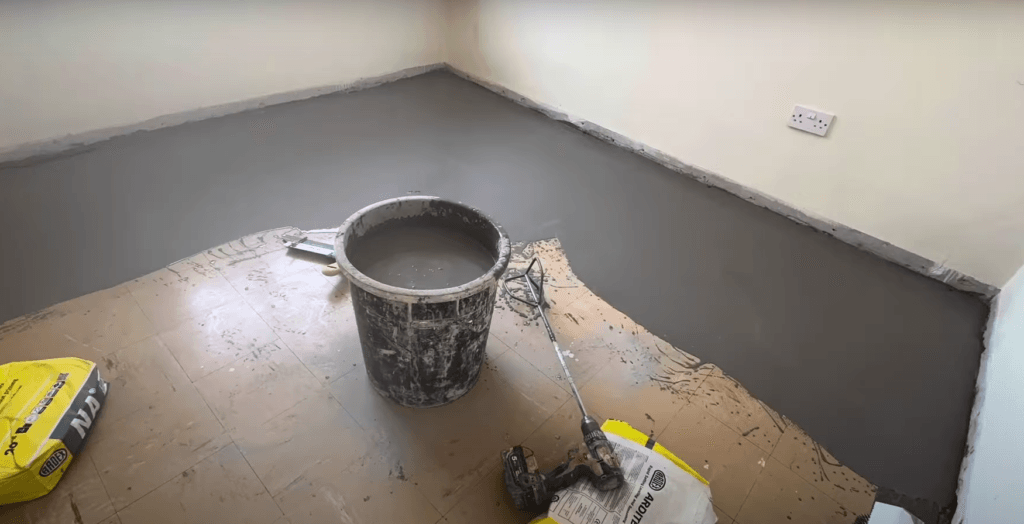
Step 2: Mixing the Self-Leveling Compound
Mixing the screed correctly is crucial for achieving a smooth, even floor.
- Measure Water: Use 5 liters of water per 20 kg bag of compound.
- Mix with an Airless Paddle Mixer: This prevents excessive air bubbles that can weaken the screed.
- For Deep Fills: Add special aggregate stones to improve the compound’s stability in thick applications.
Step 3: Applying the Screed
- Pour and Spread: Begin by pouring the mixed compound onto the floor, focusing on the deepest sections first.
- Use a Notched Spatula: Spread the screed evenly, ensuring it flows smoothly into low areas.
- Self-Leveling Process: The compound will naturally settle, but some smoothing may be required.
Step 4: Removing Air Bubbles
- Use a Spiked Roller: Roll over the freshly applied screed to eliminate trapped air.
- Ensure Even Distribution: This will help the screed cure properly without imperfections.
Step 5: Drying Time and Final Touches
- Drying Time: Depending on the thickness, allow the screed to cure for at least 24 hours before installing flooring.
- Check for Imperfections: Inspect the surface and sand down any minor rough areas if needed.
Common Mistakes to Avoid
- Overmixing: Introducing too much air into the compound can lead to weak spots.
- Skipping Edge Sealing: Not sealing gaps may result in leakage and wasted material.
- Incorrect Water Ratio: Using too much or too little water can affect strength and drying time.
Conclusion
Applying a latex self-leveling screed is an effective way to correct uneven floors and prepare a solid base for new flooring. By following these steps and using the right materials, you can achieve a professional-quality finish.


