Get 10% descount on first project
How to Fix Damp Plaster Like a Pro: A Complete Step-by-Step Guide
Meta Information
Meta Title: Fix Damp Plaster Like a Pro: Step-by-Step Guide
Meta Description: Learn how to fix damp, contaminated plaster with a professional step-by-step process, including removal, waterproof rendering, and perfect finishing.
How to Fix Damp Plaster Like a Pro: A Complete Step-by-Step Guide
Dealing with damp plaster is one of the most common yet frustrating challenges homeowners face. Those dark spots on your wall aren’t just unattractive—they often indicate trapped moisture, contaminated backing plaster, or previous repair work that wasn’t carried out correctly. When damp issues return, they can quickly compromise your decorative finish and lead to further structural problems.
In this comprehensive guide, we walk you through everything you need to know about repairing damp, contaminated plaster properly. Whether you’re a DIY enthusiast or simply want to understand the professional process, this blog breaks down the repair step-by-step, offering expert tips, safety advice, and best practices to ensure a long-lasting, flawless finish.
Understanding the Problem: Why Damp Plaster Must Be Cut Out
Damp patches on plaster are usually caused by moisture trapped behind the wall or salts travelling through from old, contaminated backing plaster. Even if the surface looks dry, the underlying issue may still be active.
Common Causes of Damp Plaster:
- Contaminated or salt-laden backing plaster (hardwall, bonding, or similar)
- Previous repair work where only the top coat was removed
- Rising damp or penetrating moisture
- Plumbing leaks that have since been repaired
- Plaster applied over wet substrate
In the scenario demonstrated, the previous repair only removed the top coat. The backing plaster underneath remained highly contaminated, allowing the damp to bleed through again. That’s why a complete cut-back to brick was required.
Step 1: Protecting the Area
Repairing damp plaster can be a messy job—dust, debris, and splashes are unavoidable. Before starting, it’s essential to protect the surroundings.
Tools & Materials Used:
- Blue floor protector
- Polythene drop sheets with adhesive strip
- Stanley knife
- Scissors
- Render tape (orange, high-strength)
Why Proper Protection Matters
A small toilet or tight space can quickly become covered in dust and rubble. By carefully sheeting the area, you prevent unnecessary cleanup and protect fixtures such as toilets, sinks, and flooring.
Step 2: Marking and Cutting Out the Damp Area
To ensure all contaminated plaster is removed, professionals always cut at least 30 cm beyond the visible damp. This ensures all salts and damaged material are eliminated.
Cutting Guidelines:
- Identify all damp areas visually.
- Mark a rectangle extending 30 cm beyond the damp patches.
- Use an angle grinder to cut straight, clean edges.
- Wear required PPE:
- Dust mask
- Safety goggles
- Heavy-duty gloves
Cutting with an angle grinder is dusty work, so take your time and ensure clear visibility.
Step 3: Breaking Out the Plaster
With your cut lines in place, it’s time to remove the damaged plaster. A small Milwaukee hammer drill or breaker is ideal for these tighter spaces.
Pro Tips:
- Start slightly inside the cut lines to avoid chipping beyond your marked area.
- Observe the substrate as you break through:
- Dry areas typically indicate no active moisture.
- Dark or soft backing plaster means contamination is still present.
In this case, the upper sections were bone dry, while the lower backing plaster was damp and contaminated—confirming the need for complete removal.
Step 4: Sealing the Wall With SBR
After cleaning back to the brickwork, the entire area is coated with SBR (styrene-butadiene rubber). This sealer stabilizes the surface, improves adhesion, and adds a moisture-resistant layer.
Why SBR Instead of PVA?
While PVA can be used for certain applications, SBR provides:
- Stronger bonding
- Better resistance to moisture
- Increased strength in the render
It’s a “belt-and-braces” approach that ensures a long-lasting repair.
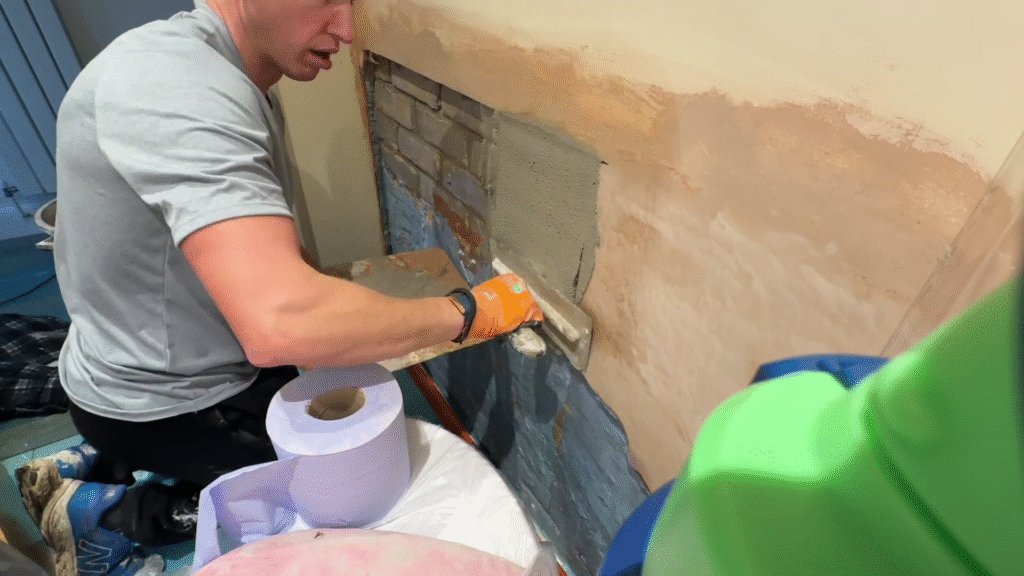
Step 5: Applying the Waterproof Render
This step is critical. If the render isn’t waterproof, the damp will eventually return.
The Mix Used:
- Weber one-coat render
- Added liquid waterproofer
- Added SBR for flexibility and strength
Application:
- Apply approximately 20mm thickness
- Use a small straight edge to level the surface
- Work side-to-side and bottom-to-top
The waterproof render creates a strong moisture barrier that prevents damp from reappearing. Even if the wall experiences future moisture, the salts cannot travel through.
Optional: Power Floating
In tight areas, a small power float can help achieve a perfectly flat finish before plastering. This saves time and ensures the final skim coat sits beautifully.
Step 6: Preparing the Render for Plastering
Unlike bonding or hardwall, sand and cement render cannot be skimmed on the same day. It needs 24 hours to harden.
Once set:
- Clean and flatten the edges using a trowel.
- Lightly key the surface using a brush.
- Apply PVA to the dry render before skimming.
This guarantees proper adhesion of the skim coat.
Step 7: Applying the Skim Coat (Plaster)
Even though it’s a small patch, the skim coat process is the same as plastering an entire wall.
First Coat Tips:
- Avoid overworking the edges where new render meets old plaster.
- Keep tight, controlled strokes.
- Expect very low suction due to the waterproof render—this is normal.
Second Coat:
After flattening with a speed skim, apply the second coat. This completes the patch and prepares it for the final trowel stages.
Final Result:
The patched area blends seamlessly with the surrounding wall, with no risk of the damp returning thanks to the waterproof barrier.
Common Mistakes to Avoid
❌ Only removing the top coat of plaster
This allows contamination to remain and damp will return.
❌ Not adding enough waterproofer
If the render sucks in moisture too quickly, you didn’t include enough waterproofing additive.
❌ Skimming too soon
Sand and cement render must be left to set for at least 24 hours.
❌ Poor protection in small areas
Damp repairs are dusty—protect before you start.
Final Thoughts
Fixing damp plaster isn’t just about making the wall look good again—it’s about ensuring that the underlying issue never returns. By removing all contaminated material, sealing the wall with SBR, and applying a proper waterproof render, you create a long-lasting, professional repair.
If you found this guide helpful, feel free to explore more tips and plastering techniques. Have questions? Leave a comment or share your experience with damp repairs!


