Get 10% descount on first project
Full Protection & Prep: Getting Your Hall, Stairs & Landing Ready for Perfect Plastering
Full Protection & Prep: Getting Your Hall, Stairs & Landing Ready for Perfect Plastering
When it comes to plastering hallways, stairs, and landing areas, preparation is the key to achieving a flawless finish. Proper protection and thorough prep work not only ensure better plaster adhesion but also keep your home clean and safe from accidental spills and splatters. In this guide, we’ll walk you through essential steps to prep your space, protect your carpets and woodwork, and create a solid foundation for perfect plastering.
Why Proper Preparation Matters
Before diving into plastering, taking the time to prepare the area properly can make a world of difference. Not only does it protect your flooring, woodwork, and walls, but it also enhances the quality and durability of the plaster job. Here’s why it’s crucial:
- Protects Carpets and Floors: Prevents stains and damage from primer, plaster, and paint splatters.
- Enhances Plaster Adhesion: Ensures the new plaster sticks firmly to old surfaces.
- Saves Time on Cleanup: Proper protection reduces the effort needed to clean up afterward.
Step 1: Protecting Carpets and Floors
To keep your carpets immaculate, start by applying heavy-duty sticky plastic carpet protectors. These are more durable than cheaper alternatives and are ideal for high-traffic areas like stairs and landings. For added protection:
- Double Layering: Double up the plastic protector in areas where heavy equipment or ladders will be placed to prevent tearing.
- Secure Edges with Render Tape: Use render tape around edges to keep everything securely in place and to block any plaster drips from reaching the carpet.
Step 2: Shielding Woodwork and Fixtures
Protecting woodwork, light switches, and electrical sockets is essential for a professional finish. Here’s how:
- Tape Up Edges: Use high-quality render tape to cover baseboards, door frames, and window sills.
- Remove or Cover Light Switches and Sockets: Unscrew light switches and sockets from the wall and cover the screws with tape to avoid losing them. This also allows for a more seamless plaster application.
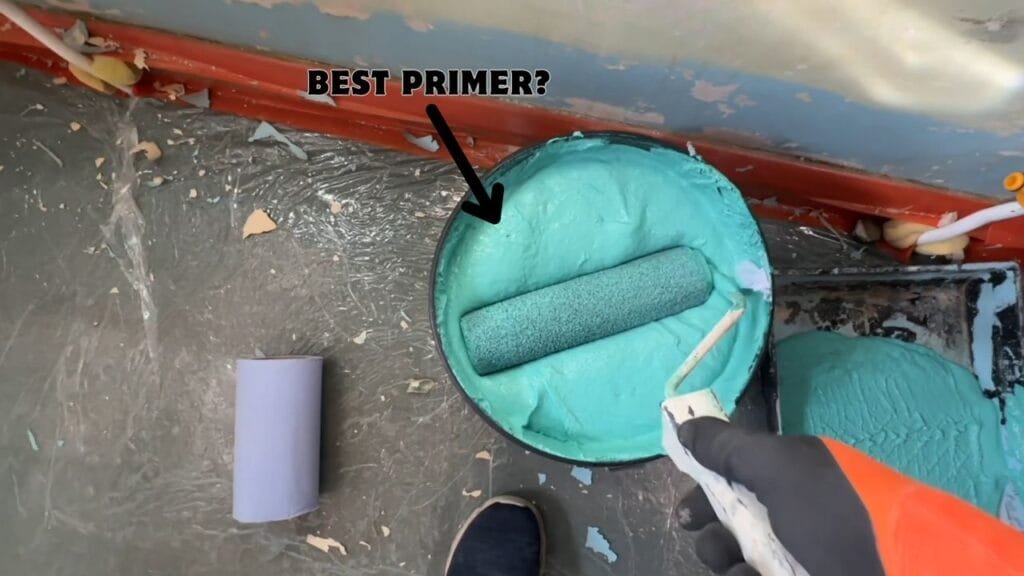
Step 3: Preparing Walls with the Right Primer
To ensure the new plaster adheres properly to old walls, using the right primer is crucial. Unlike traditional PVA, a high-quality stabilizing primer is recommended as it:
- Creates a Strong Bond: Enhances adhesion between old and new plaster layers.
- Seals Flaky Paint: Covers small bits of flaky paint, creating a stable surface.
- Controls Suction: Helps regulate moisture absorption, preventing premature drying and cracking.
Step 4: Taping Hairline Cracks
Hairline cracks are common above door frames and corners. To prevent these cracks from reappearing after plastering:
- Use Fiberglass Mesh Tape: Apply fiberglass mesh tape over hairline cracks before priming to reinforce the area and prevent future cracking.
Step 5: Clean and Tidy Workspace
Maintaining a clean and organized workspace is essential for an efficient plastering process. Adopt the “wipe as you go” method to prevent build-up of dust and debris. This helps:
- Maintain Safety: Reduces tripping hazards and dust inhalation risks.
- Improve Efficiency: Keeps tools accessible and speeds up the cleanup process.
Final Thoughts: Achieving a Perfect Plaster Finish
By thoroughly preparing and protecting your hall, stairs, and landing, you set the stage for a seamless plastering experience. Whether you’re a DIY enthusiast or a professional plasterer, these steps will help you achieve an immaculate finish with minimal mess and hassle. Ready to see these tips in action? Watch the full tutorial on YouTube here!
If you found this guide helpful, don’t forget to like, share, and subscribe to our channel for more practical plastering tips and tutorials. Got questions? Drop them in the comments below – we’d love to help!


